- Creating a framework structure
- Autoload and namespace
- Init.php
- App and Registry Classes
- Error handling class
- Routing in the PHP application
- Controller Class
- View Class
- Model
Why would you like to create your own framework?
If you look around, everyone will tell you that it doesn’t make sense to reinvent the wheel and that you’re better off picking an existing framework and forget about building your own.
In most cases, they will be right, but there are several good reasons to start building your own framework:
- Learn more about the low-level architecture of modern web frameworks in general and the internals of a complex framework in particular;
- Create a framework tailored to your needs;
- Refactor an old/existing application that requires a good dose of modern web development practices;
- Experiment by creating frameworks for fun;
This tutorial will give you the basic knowledge of creating a web framework, step by step. Remember, the framework created with this tutorial is primarily educational, but you can create a framework based on it for your purposes.
1. Creating a framework structure
To begin, in the directory with our project we will create a new folder on the name of its app. These folders will contain the main files of our web application and the implemented model MVC (Model, Vie, Controller).
This model allows you to break your code into pieces and make it clearer and easier to expand.
Model – is a part of a web application that is responsible for working with data: retrieval, storage, deletion.
View – html code that we get at the output.
Controller – connecting element between the model and the view.
In the app folder we created, we will add new folders and name them accordingly:
app
controllers
models
views
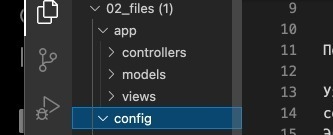
Also in the root we will create a new directory config in which in the future we will add configuration files.
app
controllers
models
views
config
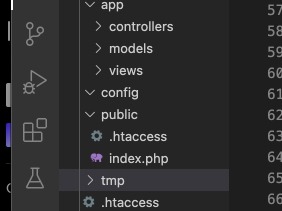
All user requests will be sent to the public directory, let’s create it as well. This folder will contain all the files that will need to be shown to the user (images, styles, scripts).
app
controllers
models
views
config
public
In the public directory we will create a new file and name it index.php all requests will be sent to it.
app
controllers
models
views
config
public
index.php
In the root we will add the auxiliary folder tmp in which temporary files (caches, logs, etc.) will be stored.
app
controllers
models
views
config
public
index.php
tmp
Now we need to make sure that when users access our domain they are not in the list of our directories but in a special public derectory that we created earlier. Requests are routed to the public directory using a web server configuration. We use Apache. In our case, we need to create a .htaccess web server configuration file in the root directory of the site and register the following settings in it:
RewriteEngine On
RewriteRule (.*) public/\
. * – receives all requests
public/$1 – the folder to which we will send the request, $1 – variable in which the request address is stored.
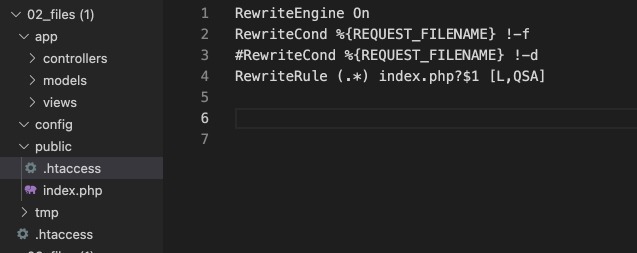
In the public directory we also create a .htaccess file and write to it:
RewriteEngine On
RewriteCond %{REQUEST_FILENAME} !-f//if the request goes to a file do not fulfill the condition RewriteRule
RewriteRule (.*) index.php?$1 [L,QSA]
Autoload and namespace in our framework
Our framework will consist of a large number of classes, as well as classes of additional libraries. Permanent manual connection of namespaces in this case is simply impossible. To solve this problem, we can use a class loader from Composer.

Init.php
Let’s continue, in the config folder of our framework we will create a new file of initialization init.php. To begin with, we will prescribe several constants for convenient work in the future:
define("DEBUG", 1); //create a variable that will turn on and off the debug mode. 1 on, 0 off
define("ROOT", dirname(__DIR__));//the path to the root of our application (folder with the project)
define("PUBlIC", ROOT . '/public');//path to the public folder, in our case "public"
define("APP", ROOT . '/app');//the path to the app folder
define("CORE", ROOT . '/vendor/core');//the path to the folder with the application kernel files
define("LOGS", ROOT . '/tmp/logs');//folder with logs
define("CONFIG", ROOT . '/config');//folder with settings
define("TEMPLATE", 'template1');//application template
define("PATH", 'https://my-site.com');// address of our web application
define("ADMIN", 'https://my-site.com/admin-panel');// admin panel of our application

// connect our autoloader generated by Composer in this initialization file instead of registering it directly in index.php
require_once ROOT . '/vendor/autoload.php';
The init.php file will run every time a user accesses our application.
To do this, connect it to our file /public/index.php:
require_once dirname(__DIR__) . '/config/init.php';
App and Registry Classes
App class – the main class of the application in which routing will be started. You only need to create one object from our app class. The Singleton pattern will help us with this. In our project, this pattern will be used several times, so we recommend creating a PHP trait.
Let’s get started! Let’s go to the /vendor/core folder and create a new file TSingleton.php, add to it:
namespace core;

trait TSingleton
{
  //can be an instance of a class or null
    private static ?self $instance = null;//?self = self|null

    //create a private constructor so that it is not possible to create an object from it
    private function __construct(){}

    //get an instance of the class through the method, not through the operator new
    public static function getInstance(): static//return static
    {
    //if we have an object written in $instance we will return it, if we address the object for the first time then it will be created
        return static::$instance ?? static::$instance = new static();
    }
}
Also in the /vendor/core folder, create a new Registry.php file. It will register our files. Add the following code to the Registry.php file:
//create namespace
namespace core;

//create new Class
class Registry
{

//use singleton trait. It's like pasting code from a TSingleton.php file into this place
    use TSingleton;

    //create an array where the data will be stored
    protected static array $properties = [];

    //create a method that will write data to the container (array) $properties
    public function setProperty($name, $value)
    {
        self::$properties[$name] = $value;// on the key $name which will be transferred we will write down value $value which will also be written down
    }

    //create a method that will receive the data
    public function getProperty($name)
    {
        //if the property is found for this key, we will return it, otherwise we will get null
        return self::$properties[$name] ?? null;
    }
    //an array that will return all properties
    public function getProperties(): array
    {
        return self::$properties;
    }

}
Before creating the App class in the /config folder, create a new properties.php file and add the following code:
return [
    'write_to_admin' => 'admin@site.com',
    'site_name' => 'TestSite',
    'site_description' => 'My site description',
    'post_per_page' => 10,
];
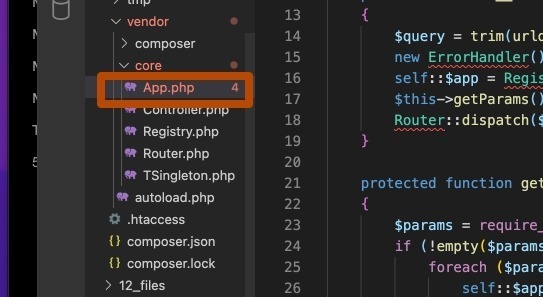
Now we can move on to writing the App class. In the same /vendor/ core folder, create a new App.php file and add the following code:
namespace core;


class App
{
    //public property in which the container will be written
    public static $app;


    public function __construct()
    {
        //Get an instance of the Registry class via the getInstance method because it uses a Singleton pattern
        self::$app = Registry::getInstance();
        //run the method immediately after creating the class App write to the variable
        $this->getParams();
    }

    //with this method we will connect parameters for our framework
    protected function getParams()
    {
        //connect an array with the parameters located in the folder /config/properties.php
        $properties = require_once CONFIG . '/properties.php'; //use the CONFIG constant


        if (!empty($properties)) {
            //we pass a cycle on parameters it is a nominal array therefore we can receive a key and value
            foreach ($properties as $k => $v) {
                //register our properties using the setProperty method of the Registry class
                self::$app->setProperty($k, $v);
            }
        }
    }

}
Now in the file public/index.php we can call our class App.php:
require_once dirname(__DIR__) . '/config/init.php';

new \core\App();

//now we can call the methods of the App class
\core\App::$app->getProperty('site_name');
In the next step, we will write a class that will collect errors from our framework.
PHP error handling class
Read this article and follow these instructions before proceeding:
In the next step, we need to write a class that will route our requests. When accessing the url, assign the appropriate Controller.
Query routing in the PHP application
Read this article and follow these instructions before proceeding:
Controller class
In the last step, we created a router that will select the controller for the request. Now we can already write our first controller.
To do this, go to the app/controller directory and create a new file with the name of the desired class – PageController (a feature of our router is that the name of the controller must end with the word Controller (without spaces))
Read this article and follow these instructions before proceeding.
View Class
Earlier we created a Router and a Controller. Now you can do the View class of our framework. To get started, we need to call this method on our Router. To do this, go to core/Router.php.
After calling action we will add:
$controllerObject->getView();//call our method of plug-in the view
Then you can create a View class. Let’s place this file in the core of our framework – /vendor/core/view.php
namespace core;


class View
{

    //variable which will store data of a kind which further will be connected in a template
    public string $content = '';

    public function __construct(
        public $route,//current route
        public $layout = '',//template name
        public $view = '',
        public $meta = [],//page metadata
    )
    {   // if we do not reassign the $layout property then use the standard template specified in the LAYOUT constant
        if (false !== $this->layout) {
            $this->layout = $this->layout ?: LAYOUT;
        }
    }

    //a method that will render our page, create a template and add a view, will also add all the necessary data to them
    public function render($data)
    {
        //if there is data in the array, the extract function takes them and makes them variable by key
        if (is_array($data)) {
            extract($data);
        }

        //delete / in the controller name for the admin part of the program
        $prefix = str_replace('\\', '/', $this->route['admin_prefix']);

        // write in a variable the path to the file with the view. the APP constant contains the path to the /app folder
        $view_file = APP . "/views/{$prefix}{$this->route['controller']}/{$this->view}.php";

        //check if this file exists in our views folder, if we do not throw an exception
        if (is_file($view_file)) {
            //enable buffering
            ob_start();
            //connect the file of View
            require_once $view_file;

            //write in the variable $ content data from the buffer
            $this->content = ob_get_clean();

        } else {
            throw new \Exception("View not found", 500);
        }

        if (false !== $this->layout) {
            //path to the template
            $layout_file = APP . "/views/layouts/{$this->layout}.php";

            // check if there is a template file, if it does not exist, throw a new exception
            if (is_file($layout_file)) {
                require_once $layout_file;
            } else {
                throw new \Exception("Template not found {$layout_file}", 500);
            }
        }
    }

}
Now in our vendor/core/Сontroller.php controller in the getViev method we will call object of class View
   public function getView()
   {
        $this->view = $this->view ?: $this->route['action'];
        new View($this->route, $this->layout, $this->view, $this->meta)->render($this->data)//pass the required data to the class of the species
   }

 // a method that will saving data for our controller which then pass them in the View.
 public function set($data)
 {
     // write in our property $ data, the data that came to the method set
     $this->data = $data;
 }
After that, we can place our templates in the /app/views/layouts folder. For example, let’s create our standard default.php template:
<?php
//set the namespace
use core\View;
?>

<!-- we will register the code for the usual html page, which in the future you can customize as you wish -->
<!doctype html>
<html lang="en">
<head>
    <meta charset="UTF-8">
    <meta name="viewport"
          content="width=device-width, user-scalable=no, initial-scale=1.0, maximum-scale=1.0, minimum-scale=1.0">
    <meta http-equiv="X-UA-Compatible" content="ie=edge">
    <title>Default template</title>
</head>
<body>

<!-- deduce our View -->
<?= $this->content; ?>

</body>
</html>
Data transfer in View
In the View our data is transmitted from the Controller using the setMeta method. To do this, in the main page controller app/controllers/MainController.php add the following methods:
namespace app\controllers;


use core\Controller;

class MainController extends Controller
{

    public function indexAction()
    {
        $this->setMeta('Homepage title', 'Homepage description');
        //by the set method we can transfer the data in our form, this data will be in the $data variable
        $this->set(['first' => 'firts varriblae text', 'two' => 'second varrible text']);

        $this->set(compact('names'));
    }

}
We can use the transmitted data in our View /app/views/Main/index.php. To do this, in our class of type /vendor/core/View.php we will add the getMeta() method which will process this data.
public function getMeta()
    {
        $out = '<title>' . ($this->meta['title']) . '</title>' ;
        $out .= '<meta name="description" content="' . ($this->meta['description']) . '">';
        $out .= '<meta name="keywords" content="' . ($this->meta['keywords']) . '">';
        return $out;
    }
}
You can now display this data in our /app/views/layouts/default.php template by adding:
<?= $this-getMeta() ?>
And in the form of the main page views /Main/index.php we can deduce our data which we transferred by a set() method.
We wrote the main part of our framework, and now we need to write a Model class that will interact with the database.