- Check Git installation
- Setting the global Git configuration
- Git initialization
- Creating commits
- View changes
- Removing file from commit
- Working with branches
Git is a version control system used to manage and track changes to software code or other text files. It is one of the most popular tools for teamwork on software projects and is the standard in the software industry.
Git is designed to efficiently work with large projects and allows you to securely track the history of changes, experiment in individual branches, and easily recover from errors.
To begin, you need to open a terminal and go to the folder with your project, you can use the terminal built into the operating system or use the terminal of your code editor.
Check Git installation
To get started with Git, you must install it on your system. To check if Git is installed, open a terminal and type into it:
git --version
If your operating system already has Git installed, you will see the Git version number:

Otherwise, use the installation instructions available on the project’s official website:
MacOS – https://git-scm.com/download/mac
Windows – https://git-scm.com/download/win
Linux – https://git-scm.com/download/linux
Setting the global Git configuration
A global Git configuration is used to save settings that apply to all Git repositories you work with on a particular computer. It helps configure the behavior of Git, as well as store personal information such as a user’s name and email.
Enter in the terminal:
git config --global user.name "Name"
git config --global user.email "Email"
After that, a gitconfig file will be created in which all changes in the git configuration will be recorded:
To view this file, use the command:
cat ~/.gitconfig
To view all settings set in gitconfig, use:
git config --list
- System level: Configuration that applies to all users on the system.
- At the system level on macOS, the gitconfig file is usually located in /etc/gitconfig. This file contains settings that apply to the entire system, that is, to each user on this computer.
- User level. Configuration that applies to all repositories of the current user
- Typically the file is located in the user’s home directory, for example ~/.gitconfig or ~/.config/git/config.
- Repository level. Configuration that applies only to a specific repository
- This file is located in the .git directory within the repository, for example .git/config.
- Repository level. Configuration that applies only to a specific repository
- This file is located in the .git directory within the repository, for example .git/config.
If you want to know which configuration file Git uses for a particular setting, you can use the command:
git config --show-origin <parameter>
Git initialization
Initializing Git means creating a new Git repository in your working directory. Here are the basic steps to initialize a new Git repository.
You need to start the terminal from your project directory or go to the folder with your project using the commands:
cd /path/to/project
Go to our project and add the following command to your terminal:
git init
The git status command in Git displays the current status of the repository.
File tracking
To track changes in files, first we need to add these files to tracking, for this we will use the command:
git add <filename>
Example:
git add index.html
If you need to add all new and changed files, you can use the command:
git add .
The git status command shows which files are being tracked, which have changed, and which are in the commit index.
Remove file from tracking
If you’ve already added a file to the index (staging) using the git add command, but then change your mind and decide you don’t want to include that file in the next commit, you can use the git reset command to remove it from the index without removing it from the working directories.
Example:
git reset HEAD src/index.js
Now this file will not be included in the next commit until you add it again using git add. This is useful if you want to reconsider which files should be included in a commit, or if you want to partially reset staged changes.
Creating commits
A commit creates a “snapshot” of the current state of files and directories in your working directory, saving it to the project’s history. Each commit is assigned a unique hash (identifier) that allows it to be referenced in the future.
When you commit, Git stores information about:
- Changes: what exactly was added, changed or deleted in the files.
- Author: who made the commit (name, email).
- Commit message: a description of the changes or the reason why they were made.
- Time: date and time when the commit was made.
For example, let’s create a simple commit describing the changes:
git commit -m "Added new styles for buttons"
For more complex commit messages (such as multi-line ones), you can open a text editor:
git commit
Having made new changes to the monitored files, we can see what exactly has changed using the command:
git status
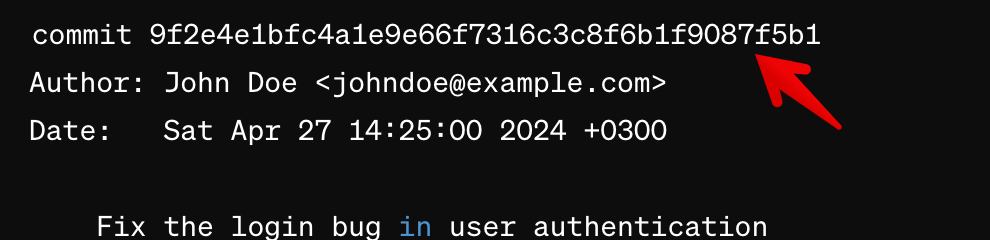
Verify that the commit was successful using the git log command, which will show the history of our commits.
Example
commit 9f2e4e1bfc4a1e9e66f7316c3c8f6b1f9087f5b1
Author: John Doe <johndoe@example.com>
Date:   Sat Apr 27 14:25:00 2024 +0300

    Fix the login bug in user authentication

commit a7f3c22d75e88e6e0980a76e87b3b4b6d3e4f8c5
Author: Jane Smith <janesmith@example.com>
Date:   Fri Apr 26 16:45:22 2024 +0300

    Add new feature for user profile customization

commit b8c78e1d6a6fbd76d3f65b5a8aef9bcb832f3f4b
Author: John Doe <johndoe@example.com>
Date:   Thu Apr 25 10:33:12 2024 +0300

    Refactor the codebase for better readability

commit d2c88a3bd2f1f85a645b8c97f7d1fbd5e3a7e1e6
Author: Jane Smith <janesmith@example.com>
Date:   Wed Apr 24 09:22:45 2024 +0300

    Initial commit with basic project structure
git log --oneline command will display a shortened view of commitsAs we can see, each commit has its own unique code:
This unique code is called the Commit Hash.
View a commit
To view detailed information about a commit, use the command:
git show
If you simply enter this command, information about the last commit opens. But we can use the commit hash to reveal information about it.
For example:
git show 9f2e4e1bfc4a1e9e66f7316c3c8f6b1f9087f5b1
We get something like this:
commit a7f3c22d75e88e6e0980a76e87b3b4b6d3e4f8c5
Author: Jane Smith <janesmith@example.com>
Date:   Sat Apr 27 14:25:00 2024 +0300

    Add new feature for user profile customization

diff --git a/profile.js b/profile.js
index d41d8cd..e69de29 100644
--- a/profile.js
+++ b/profile.js
@@ -1,0 +1,10 @@
+// New user profile customization feature
+function customizeProfile() {
+    console.log("Customizing user profile...");
+}
+
To see only the names of files affected by a commit, use the --name-only flag
git show --name-only a7f3c22d75e88e6e0980a76e87b3b4b6d3e4f8c5
To see change statistics, including the number of lines added or deleted in each file, use the --stat flag:
git show --stat a7f3c22d75e88e6e0980a76e87b3b4b6d3e4f8c5
Restoring a file from the last commit
If you want to “skip” changes, i.e. undo them in one file and restore it to the state of the last commit use the command:
git checkout index.html
Restoring using a hash
git checkout a7f3c22d75e88e6e0980a76e87b3b4b6d3e4f8c5 index.html
After running this command, the contents of the index.html file in the working directory will be replaced with its contents in the specified commit. This change does not affect the current state of the branch you are working on or other files in the project.
Recovering a deleted file
The git checkout <filename> command can be used to restore a deleted file if it has been deleted but the changes have not yet been committed.
If a file has been deleted but the changes have not yet been committed to the repository, using git checkout <filename> will restore it to the state of the last commit.
However, be careful: if a file has been deleted and committed, any restoration of the file may overwrite current changes or branches. Make sure you’re working in the right context and that restoring the file won’t cause you to lose data that you still need.
View changes to a file
After making commits, we can see what exactly has changed in the files. To do this you can use the git diff command.
For example:
git diff index.html
If you use git diff without any additional options, the command will show all the changes in working files since the last commit (in a repository or branch).
If you use git diff --cached or git diff --staged, the command will show changes that have been added to the index (staging area) but not yet committed.
Comparing two commits
Using git diff <commit1> <commit2>, you can compare the changes between two commits to see what was added, removed, or changed.
The command will return:
diff --git a/example.txt b/example.txt
index abc1234..def4567 100644
--- a/example.txt
+++ b/example.txt
@@ -1,4 +1,5 @@
Old text
+Added line
 Modified string
-Deleted line
+Replacement of a deleted line with a new one
Comparison of branches
The git diff branch1 branch2 command allows you to compare the differences between two branches.
Directory comparison
You can use git diff path to compare changes to a specific file or directory.
Example:
$ git diff src/
Removing a file from a commit
If we have created a commit and it contains a file that we do not need, we can remove it from the commit using the git rm command:
git rm css/test.css
Procedure:
- Find the hash of the commit from which we want to delete the file. For this, we will use the
git logcommand.The git log -1 command allows you to view only the most recent commit - Copy the hash of the commit.
- Delete the file from the commit:
git rm css/main.css
- After deleting the file, commit the changes:
git commit --amend -m "Change description"
In order not to change the text of the commit, you can use the command:
git commit --amend --no-edit
git rm --cached css/main.css
Working with branches
In Git, branches are a concept that allows you to work on multiple tasks or functionality in the same repository without interfering with each other. Imagine you have a development main line (often called main or master) and you want to work on a new feature or bug fix. Instead of changing the main line, you create a “branch” for this task.
Branches allow you to work on different parts of a project independently. This is especially useful when multiple people are working on the same repository. Different team members can work on their own branches and then merge them into the main code when the work is complete.
Creating branches
Creating a branch from the current repository point
You can create a new branch from the current repository point. To do this, use the git branch command.
For example:
git branch branch-name
Creating a branch from a commit
To create a branch from a specific commit, Git uses the command git checkout -b or git switch -c.
For this:
- Find the commit you want to create a branch from using the
git logcommand - Use the command
git checkout -b branch-name commit-hash, where branch-name is the name of the new branch and commit-hash is the hash of the commit you want to start the branch from.git switch -c my-feature-branch abc1234
Once the command is executed, Git will switch to this new branch.
The git log --oneline --all command displays a condensed summary of all commits in the repository (one line per commit), including commits from all branches.
Switching branches
In Git, switching between branches is done using the git switch or git checkout command. In modern versions of Git, it is recommended to use git switch as it is more specific to this task, while git checkout can perform many functions, which sometimes leads to confusion.
git switch branch-name
Switches you to the specified branch branch-name. If the branch does not exist, it will throw an error.
To check which branch you are on, you can use the command:
git branch
How to merge branches
Merging branches (merge) in Git is used to combine changes from different branches into one.This allows work on a specific task to be isolated and then connected to the main development line when the work is completed.
Standard merge
Creates a new commit that merges the history of two branches.
How to do a merge:
- Switch to the branch you want to merge into:
git switch main
or
git checkout main
- Merge to another branch:
git merge branch-name
Where branch-name is the name of the branch.
If everything went well, Git will report that the merge was completed. If there are conflicts, Git will indicate where they are and offer to resolve them.
git merge branch-name -m "My message"
Conflict resolution
If there are conflicts during a merge, Git will stop and ask you to resolve them. Conflicts arise when the same piece of code has been changed differently in different branches.
Manual conflict checking
Git will indicate which files contain conflicts. You can review them and decide how to resolve them:

Choose which comment to leave or leave all. After conflicts are resolved, add the files to the index and commit:
git add .
git commit -m "New commit"
Rewritten merge (Rebase)
Sometimes, instead of merging, “rebase” is used – transferring changes from one branch to another. It avoids additional merge commits, but changes history, which can be problematic for collaboration.
How to do:
- Switch to the branch you want to “rebase”:
git switch branch-name
-
git rebase master
The git rebase main command rebases the current branch from the master branch. This means that Git will push all commits from the current branch to the end of the master branch.
When executing git rebase main, Git does the following:
- Git determines the last overall commit between the current branch and the master branch.
- Git “rewinds” the current branch to the general commit, temporarily storing all commits after that point in the “rebase stack”.
- Git moves the current state of the main branch into your current branch, such that your branch is now a “continuation” of the main branch
- Git “replays” the saved commits from the “rebase stack” one by one so that they are based on the new state of the main branch.
- If there are conflicts during the rebase, Git will stop and ask you to resolve them. Once the conflicts are resolved, you can continue with the rebase.